
Extend the Laptop Screen Upwards without Dual Monitor Mounts! Save Spaces with Quick-Released, Vertical Stacked Dual Monitors
2024/06/12|By G Editor
Using split screen or dual screens to improve efficiency is an indispensable digital work skill. Most digital workers set up 20-inch large screens side by side, working on the main screen, and positioning the second screen on the left or right side for assistance. They have to turn their heads widely and frequently to watch the two screens, which unknowingly causes long-term damage such as chronic strains and spinal injuries. This kind of setup is also limited by space. Placing two large screens on a small table not only takes up more space, but also creates a messy and crowded feeling.

If you want to improve your work efficiency while taking into account your health, you must not miss the ergonomic "vertical stacked dual monitors" setting up to extend the viewing range vertically, optimize desktop space for maximum utilization, and set up an exclusive multi-monitor layout.

Dual Vertical Monitors Set up:
To Work Intuitively & Comfortably
If you are used to walking around with a lightweight laptop and then connecting it to an external large screen or positioning the second monitor next to it when you are back to the workplace, you may wonder the arrangement of "dual vertically stacked monitor." Undoubtedly, the external big screen and the second monitor on right or left are both aimed for increasing work efficiency. However, perfection is impossible in every circumstance:
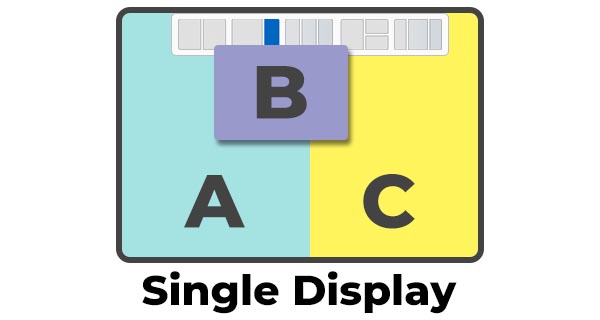
| One Big Monitor | Side-by-Side 2nd Monitor |
| When opening a new window, the user needs to re-arrange split-screen layout every time.
|
Drag the window once and it will be opened in a specific screen.
|
| The larger the screen is, the harder it is to maintain an appropriate viewing distance. | If its size is too large, frequent head turning may cause shoulder and neck pain. |
| The laptop screen turns out to be an auxiliary, idling, or to be closed the lid. | Use the laptop as primary monitor and the second screen for auxiliary information. |
| It should be used with an external keyboard. |
It's able to use with its original keyboard. |
| It is often fixed with VESA bracket and used at limited spot. | The angles of the two can be adjusted separately to avoid glare. |
| The installation is relatively complicated and it takes up more space. | It takes up more desktop space. |
| The larger the screen is, the worse the glare and color cast will be. | The angles of the two can be adjusted separately to avoid glare. |
| The width of windows in split-screen mode appears to be narrower. | Display dual windows in full screen. |
A Good Vertical Stacked dual monitorssetup improves the troubles above and relieves neck and shoulder pain:
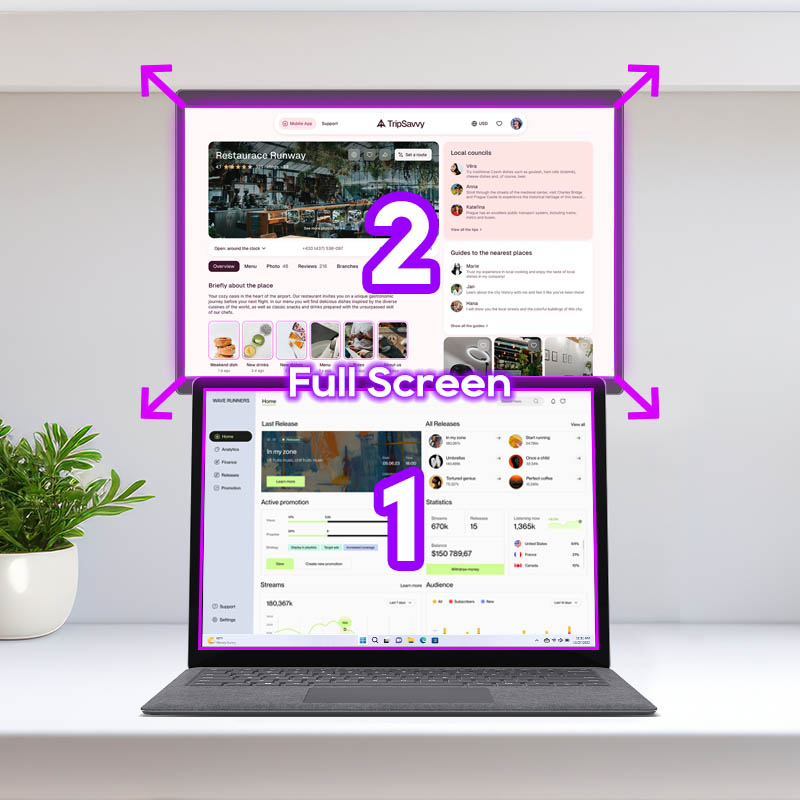
1. Drag the window to the specified screen, and the windows can be displayed in full size respectively.
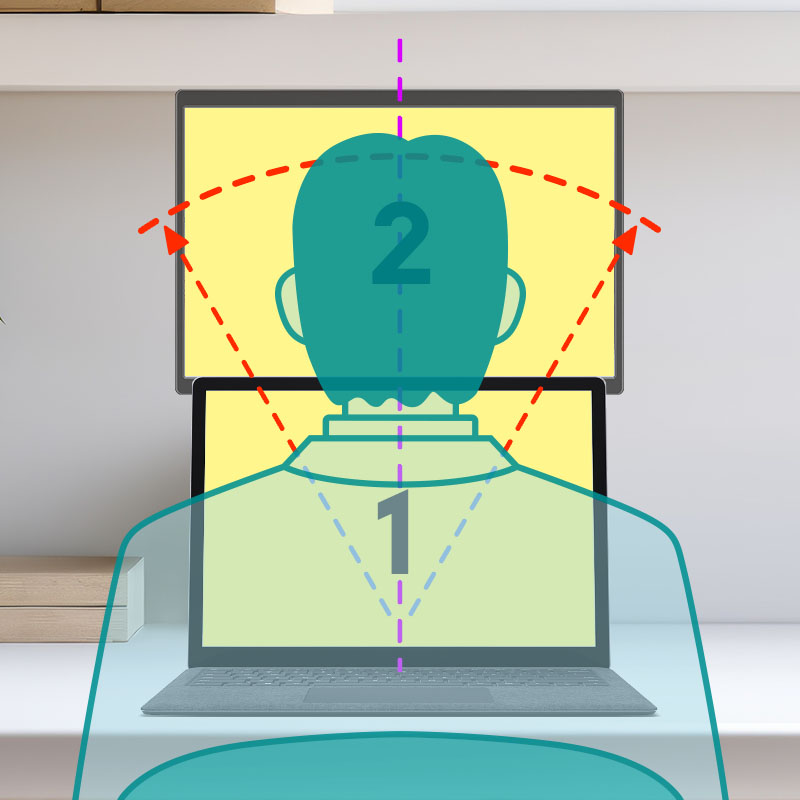
2. Align the two screens in the center. Users no need to move head left and right, which improves eye fatigue, shoulder and neck pain.
3. Provide ergonomic viewing angle. Users no need to tilt up the head to view the large screen.
4. It can be used with the laptop's original keyboard and there is no need to connect to the external keyboard.
5. Choose a portable monitor and use with a quick-release "desktop stand" for easy and quick installation.
6. Save desktop space and reserve the left and right sides of the desktop for files and books
7. Adjust the viewing angle of laptop and the external screen independently.


Common Layouts for Stacked Dual Monitors
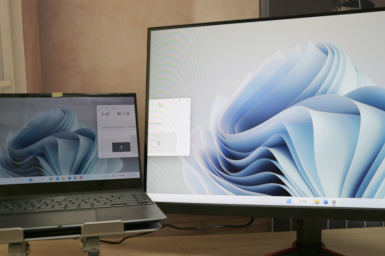
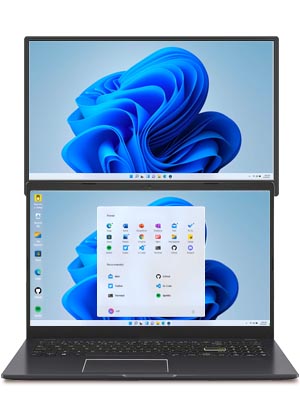
Common layouts for vertical stacked monitors are as follows. For laptop, adding a new appropriate size monitor above the laptop emphasizes the advantages of laptop's mobility, comfortability, ergonomics and a higher cost-performance ratio. Using M1 series portable monitors with M1S4 lifting stand makes it can be quickly adjusted according to the size of the laptop and the height of the user. With the quick-release female connector on the back, M1 monitor can be quickly inserted and released for carrying at any time or installed on the desk. The stand can be placed at anywhere making the application more versatile and convenient.
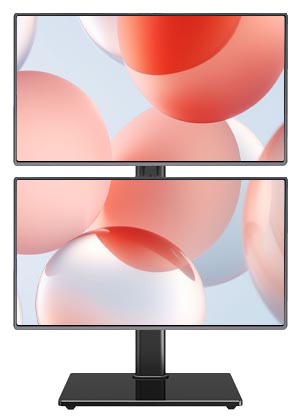
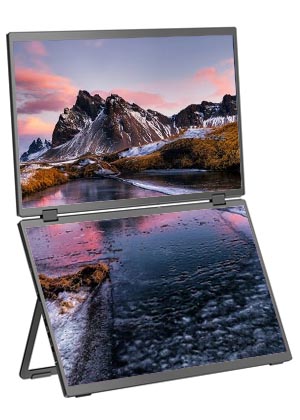
| M1 Portable Monitor | Desktop Monitor | Folding Monitor | |
 |
 |
 |
|
| Split Screen | Drag and display Windows respectively on the upper and lower monitors. | Drag and display Windows respectively on the upper and lower monitors. | Have to install drivers. |
| With Laptop | Use laptop's original keyboard. | Have to connect an external keyboard. | Have to connect an external keyboard. |
| Installation | Lifting quick-release stand | VESA mount/ clip table Mount | with self-contained stand |
| Height Adjustment | Liftable | Liftable | Fixed |
| Angle Adjustment |
Yes (Not affect the stand's stability) |
Yes (Not affect the stand's stability) |
Limited (Affect the stand's stability) |
| Mobility | Quick to release and easy to carry | Hard to disassemble and be carried | Hard to be carried |
| Price | Medium range | Medium range | High range |
| Tilt Angle | Adjustable | Adjustable | The lower screen easily reflects light from ceiling. |
Simpler and Less Space-Consuming than VESA Mounts!
Three Major Advantages of Setting up "Laptop Stacked Dual Monitors" with M1S4 Quick-Release Stand
➽ Similar Screen Size
Vertically stacked monitors are very friendly to laptop users. By choosing an upper monitor with similar size or slightly larger than the laptop screen, the widths of the two screens will be closer, which reduces the gap when switching the field of view. This means, when using a 13-inch laptop, the best size of the secondary monitor is from 13 inches to 15 inches (such as M141E, M152H); and when using a 15-inch laptop, the best option is 15 inches to 16 inches monitors (such as M152H, M161H).
The screen size also makes effect on the viewing distance. If choosing a screen that is too large, you will have to view the upper screen from longer viewing distance, but meanwhile you need to view the small laptop screen at close distance, which easily results in eye fatigue because of the difficulty of keeping the correct viewing distance.


➽ Adjustable Height
Setting the height of the upper monitor as close as possible to the top edge of the laptop is not only aesthetically pleasing, but also appears visually smooth when dragging windows between the two monitors. Most importantly, raising your field of view improves the habit of forward neck posture or hunching. On the premise of maintaining a correct sitting posture, you can try to keep the height of the screen below eye level according to your height and avoid placing it at an excessive height, which leads head-up tilt position and results in greater pressure on the cervical spine.
➽ Preserving Screen's Mobility
"VESA bracket" is commonly used to lock the screen on a wall mount or cantilever bracket. It is not only stable, but also with good flexibility in monitor orientation, tilt angles, etc. adjustment. However, the monitor arm is relatively bulky. When installing the VESA bracket, you need to drill into the wall, clamp the table or make holes in the tabletop. It is also limited by space. When using on a small desktop, the bracket compresses the depth of the desktop and you will feel too close to the screen. Also, due to the complexity of installation, once you lock it, you won't easily remove the screen.

However, the biggest advantage of laptops lies in "mobility". Using with individual, easy-to-move desktop stand, which provides the flexibility of modular setup for multiple monitors. The M1S4 quick-release monitor stand retains the flexibility of "quick-releasing, portability, and convertibility,” which is able to be adjusted when using laptop at the different places. If you want to upgrade to multiple screens configurations in the future, you can add new ones and change the layout at any time.
* Select the second monitor according to the recommended size and models above.
Great Application for vertically stacked monitors
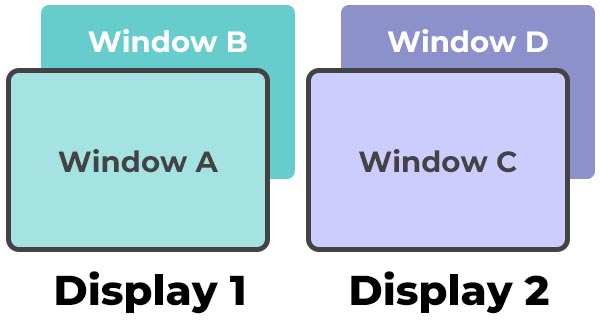
Almost all multi-window work can be easily adapted to stacked monitors.
Use the upper monitor as the main screen and the lower laptop as a secondary second monitor. Keep your eyes straight ahead and you will naturally return to the ergonomic sitting posture when viewing. Drag the information that need to be cross checked or the window that you only view occasionally to the lower screen:
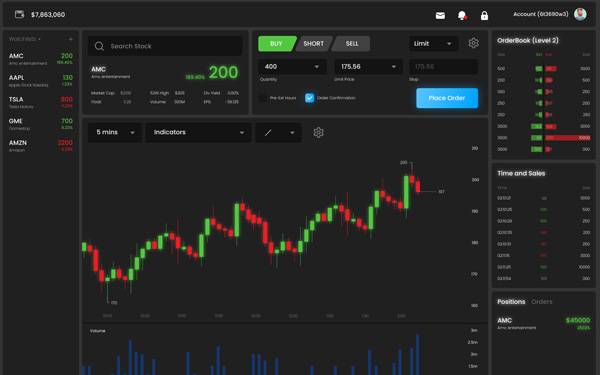
1. Watch Stocks + Stock Trading

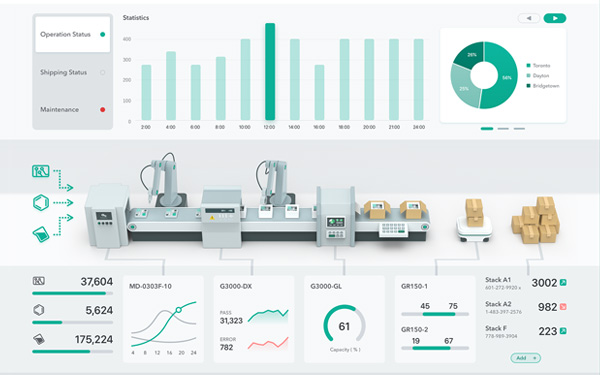
2. Production Line Dashboard + Work Window

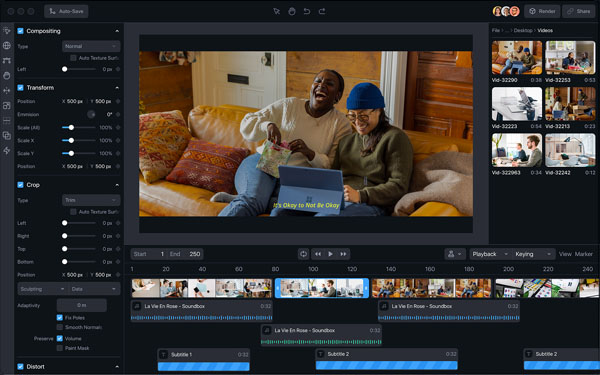
3. Video Editing Timeline + Preview Screen

4. Browser + Email

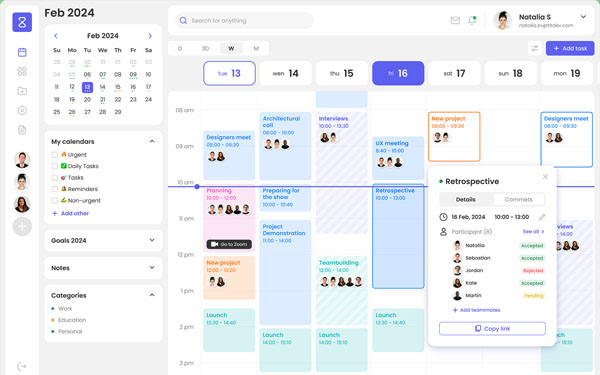
5. Project Management Software + Video app
6. Writing or Viewing Presentation + Reference Materials

Install M1S4 Stand

Step 1
Insert to the stand.

Step 2
Adjust the height.

Step 3
Connect and manage cables.

Step 4
Adjust to the relative position.

Step 5
Customize the tilt angles.
➜ Read detailed installation steps::
Multiple Monitors, Multiple Layouts:
Flexibly Adjust to Vertical / Horizontal Orientation
The M1S4 desktop monitor stand saves space, and is easy to be moved and used. It also brings scalability to the setup of multiple monitors. You can upgrade the setup to four screens, or even add a vertical screen according to the needs, which has the flexibility. The layout of the desktop can be adjusted at any time to support your personal needs.