Use a Touchscreen Monitor with MacBook! Install Dual Operating Systems with Boot Camp & Build a Windows 10 Bootable Drive
2021/09/22 |By G.Editor
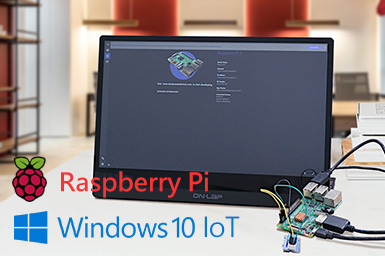
Dual-booting two operating system, Windows and macOS, on MacBook becomes lots of users' choices, which brings more convenience for work and entertainment. Whether you want to do work with Windows Office or play Windows-only online games, both can be done on the super-thin MacBook! The most important thing is when running Windows on MacBook, it supports the external touch signals, which means it is possible to use the external second touchscreen monitor on Mac!
We have included two ways to install Windows 10 on your MacBook by using Boot Camp. Select the one based on your needs!
✅ Method 1 : Install Windows directly on your MacBook's hard drive. A simpler and faster method!
✅ Method 2 : Install Windows on an external hard drive without taking up the precious MacBook hard drive space.
Install Windows 10 to MacBook
💡Method 1: Run Windows on MacBook with Boot Camp
✅ Required Equipment: MacBook 💻
Use MacBook's built-in Boot Camp to install Windows 10 system. It only takes 2 to 3 minutes to install Windows to MacBook!
To ensure a successful installation, before starting, please make sure that your macOS is already the latest version – Big Sur!
Please select Menu > "System Preference" > and then press "software update" to check whether the version is the newest!
Step1: Download Windows ISO File
#1: Go to the download page → https://www.microsoft.com/en-us/software-download/windows10ISO
#2: Select Edition > Select Windows 10 > Press Confirm

#3: Select Product Language > Select English >Press Confirm

#4: Press "64-bit download" to start downloading it.

Step 2: Use Boot Camp to install Windows
#1: Open Launchpad, and search "Boot Camp"> Open it
#2: Select Continue

#3: Select the Win10 ISO file that we just downloaded > Press install to start installation.
▶ Pull left and right to change partition size of macOS and Windows OS.

💡Freely switch between Windows and macOS system:
Shut down MacBook > press the power button> hold the Option button until the drive options appear on the screen > select the Windows drive, and you will be able to boot the Windows system!
💡Method 2: Make External Windows Bootable Hard Drive
If you do not frequently use Windows, and don’t want to take up MacBook’s hard disk space, installing Windows 10 on an external hard drive is a good option. When you want to switch to Windows system, just plug in the external hard drive to boot Windows 10. It’s highly recommended to choose a high-speed SSD for smoother operation.
✅ Required Equipment: Windows Laptop, MacBook, External Hard drive (SSD), wired keyboard and mouse.
Step 1: Check the macOS is the latest version (please refer to the method 1.)
Step 2: Download Windows Support
#1: Open Boot Camp on MacBook.
#2: Press Action at the upper toolbar >Download Windows Support > Save on the desktop

#3: Connect to the external hard drive > Drag the Windows Support file on the desktop into the hard drive to backup.
External Hard Drive Partition
*If the Windows Support file cannot be moved to the external hard drive, please divide the external hard drive into two sections!
Method: Open the System Disk Tool> click Partition> select ExFAT at formatting > click apply
Step 3: Use Windows laptop to download Windows ISO image file and save to desktop!
Step 4: Download WintoUSB widget to install Windows ISO file to SSD as the boot drive.
#1: GO to the page and press Download: https://www.easyuefi.com/wintousb/index.html
#2: Click the folder icon at image file, and select the Windows (CD-ROM image file) that we just downloaded.

#3: Select "Windows Home Edition"(The free version only supports Home Edition!), and then click Next!

#4: Choose your disk ▶ Select "GPT for UEF" ▶ Click "Yes"

#5: Select "Legacy" for installation mode > Click "Next"

#6: Start downloading! After completed, the Windows operating system will be installed in the hard disk!

Step 5: Boot Windows from the external hard drive
#1: Press MacBook’s power button, then press and hold the Option key until the option of the external hard drive appears > Select the external drive

#2: Connect to the wired keyboard and mouse to complete Windows startup settings! (Just follow Windows instructions to finish the steps.)

#3: After entering to Windows desktop, drag the downloaded "Windows Support file" to desktop!
#4: Click "Windows Support" file > Click Boot Camp> Open Setup file> Start to run the driver. After restarting, it is done!

*If your MacBook is the latest M1, you will not be able to use Boot Camp to install Windows! Please refer to 9to5Mac’s article to use Parallels to install Windows: Click here to read the article.
Testing Time - Connect an External Touchscreen Monitor to MacBook
After installing Windows 10 on the MacBook, it supports Windows environment! Let’s connect the touchscreen monitor to MacBook by the in-box USB Type-C cable, which can transmit touch, video and power signals at the same time. If you find that the touchpoint is inaccurate, that is not a big problem! Use Windows Tablet PC touch calibration function to calibrate the touch input accuracy!
Just type in the search bar: "Calibrate the touchscreen"> Click "Calibrate the screen for pen or touch input" > Select the name of the monitor model on the display> Click "Calibrate", and then follow the instructions on the screen to finish calibrating!
")

For more Windows touchscreen trouble shootings, please refer to the article:
Touch Screen Not Working? Windows 10 Touch Screen Calibration & Troubleshooting
▼ Scrolling webpages, PowerPoint and other files can be more easily. The intuitive way makes you more concentrated on work without getting distraction!

▼ Sign a document without a scanner or printer!

▼ Both sides can operate the screen when doing face-to-face discussions! One uses the mouse to operate the screen, the other one can directly operate the screen with fingers!

The thin, light, stylish MacBook is lots of people’s top choice. Compared with ordinary Windows laptop, MacBook especially has the advantage to run two operating systems, allowing users to switch between MacOS and Windows. If you need to use the original Microsoft Office or compile the program under Windows environment, installing the dual operating systems on MacBook helps your work run smoother. By connecting M505T touchscreen monitor to MacBook, scrolling web pages or zooming in and out reports can be intuitively done by fingers. Be sure to use it to increase convenience and improve work efficiency!