
Raspberry Pi IoT Application--Install Windows 10 IoT Core and 15.6-inch Touch Monitor
2021/07/19 |By G Editor
Internet of Things (IoT) application is a popular technology topic in recent years. By connecting devices to the cloud, collecting data, monitoring the environment, computing at the edge and even remotely controlling devices, it is used to make Industry 4.0 unmanned factories or smart homes come true.
In response to the extensive demand of the Internet of Things, Microsoft® has developed a series of Windows IOT operating system and Azure cloud computing platform based on Windows Embedded. In the Windows 10 IOT OS family, Windows 10 IOT core version is designed for supporting Raspberry Pi. The compact and affordable Raspberry Pi can be adopted to incorporate IoT applications as an IOT gateways or edge computing devices.
According to the following instructions, you can easily install the Windows 10 IOT core operating system on Raspberry Pi. After connecting M505T touch monitor, the Windows 10 compatible M505T is plug-and-play after booting. Let's take a look at the touch operation of M505T and Raspberry Pi with Windows IOT core.

1. Install Windows 10 IoT Core
Windows IOT Core is the most streamlined version of the Microsoft IOT operating system. It is developed for small smart devices and supports small single boards such as Raspberry Pi, Minnowboard, Dragonboard, and NXP devices. It is recommended to use the software provided by Microsoft-"IOT Core Dashboard" for system installation.
Download software ”IoT Core Dashboard”:Click here to download ”IoT Core Dashboard”
① Install ”IoT Core Dashboar” in your laptop and launch it
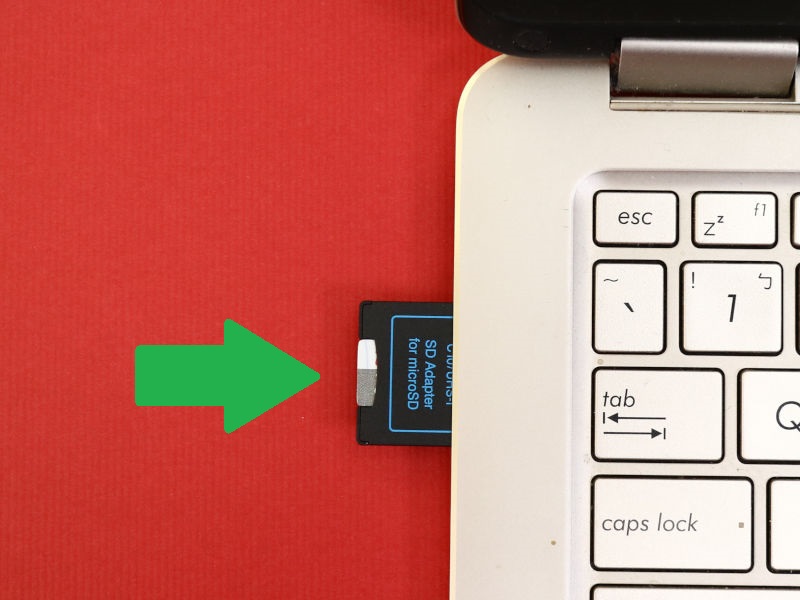
② Insert the formatted SD memory card into the laptop
③ Click “Set up a new device”:Choose "Broadcomm [Raspberry Pi 2 & 3]" in "Device type"
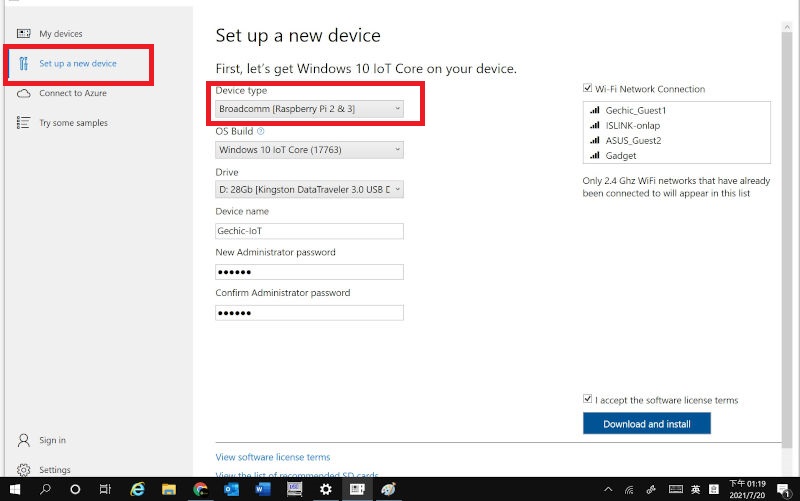
④ Enter the Device name and password

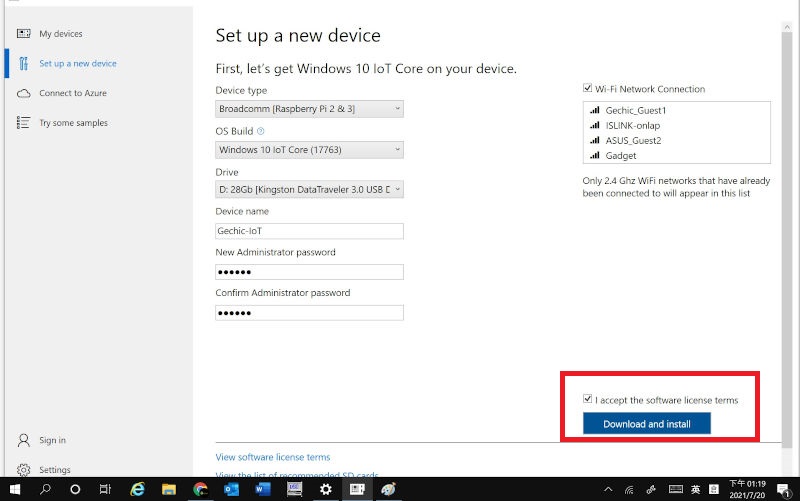
⑤ click “ Download and install”
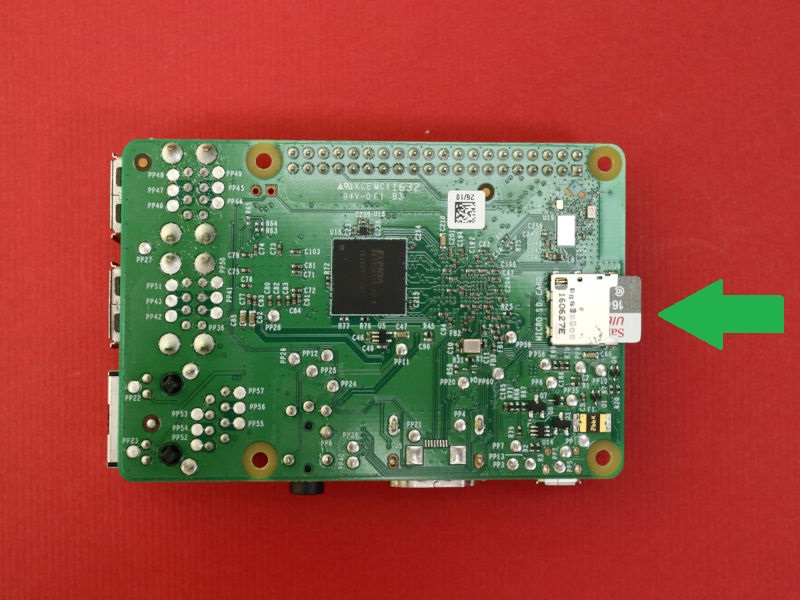
⑥ Insert the installed SD memory card into Raspberry Pi
2. Install M505T Touch Monitor
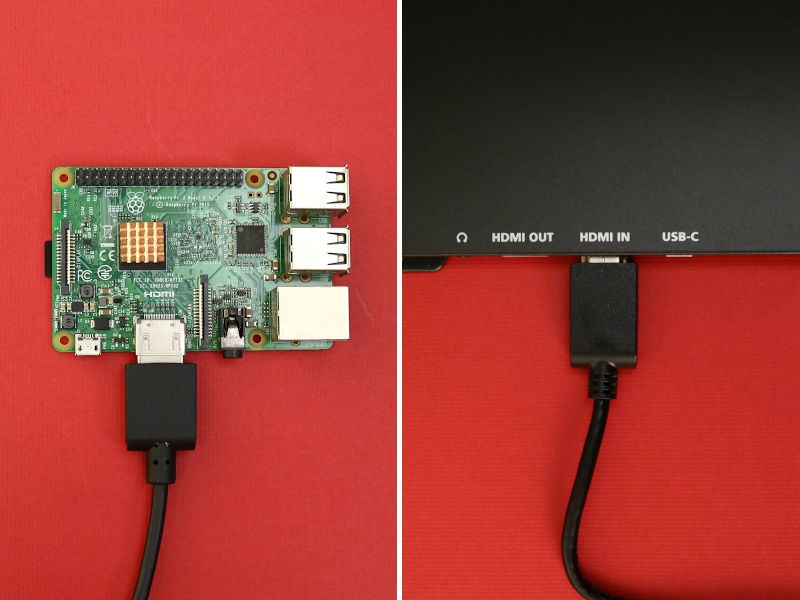
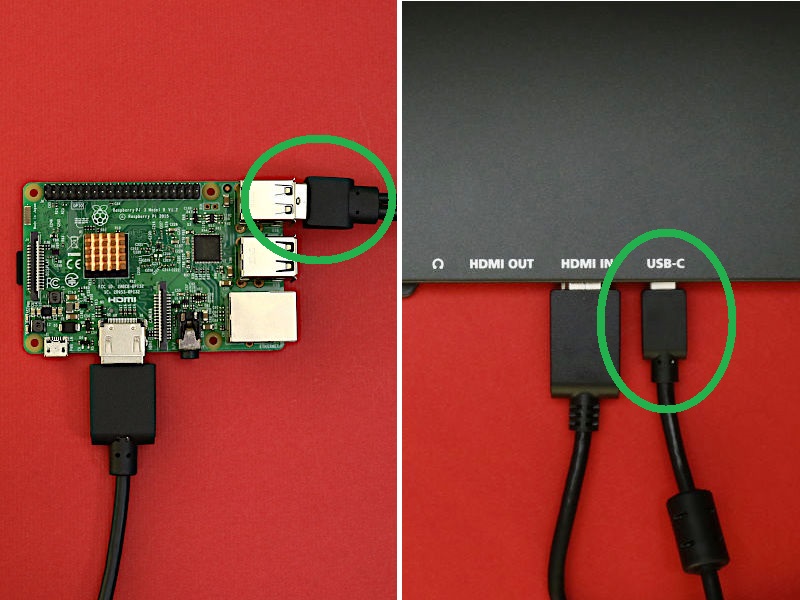
① Plug the HDMI Cable into M505T and Raspberry Pi respectively
② Plug the USB-A to USB-C Touch Signal Cable into the USB-A port on Raspberry Pi and USB-C port on M505T to transmit touch signals
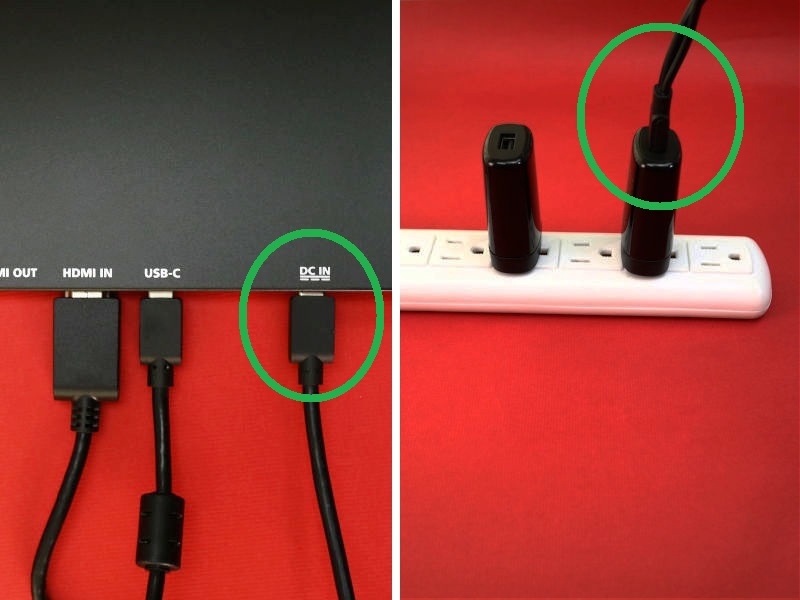
③ Plug the USB-C Cable into the power port on M505T and 5V-2A charger to power the monitor
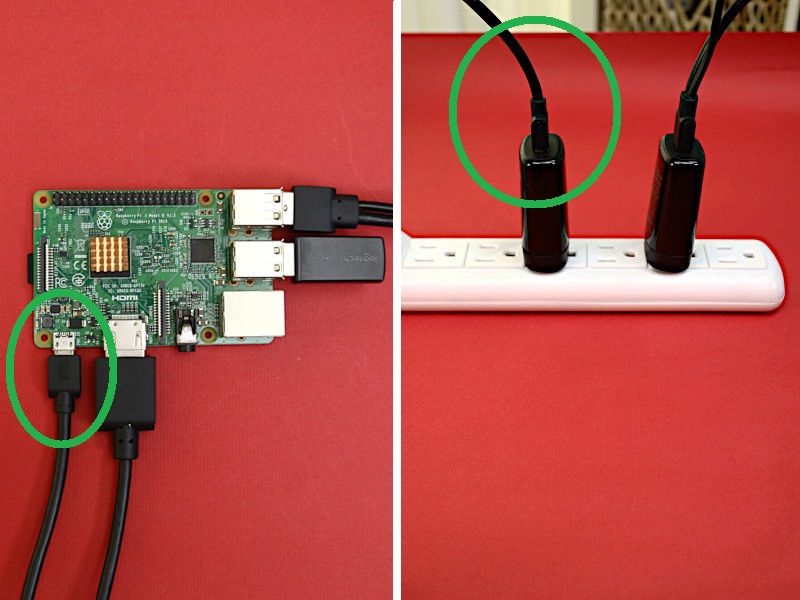
④ Plug the USB-A to Micro-USB cable into the Raspberry Pi and power charger
⑤ After booting on, M505T can be touched immediately. Finish the other settings by Windows 10 IoT Core instructions.
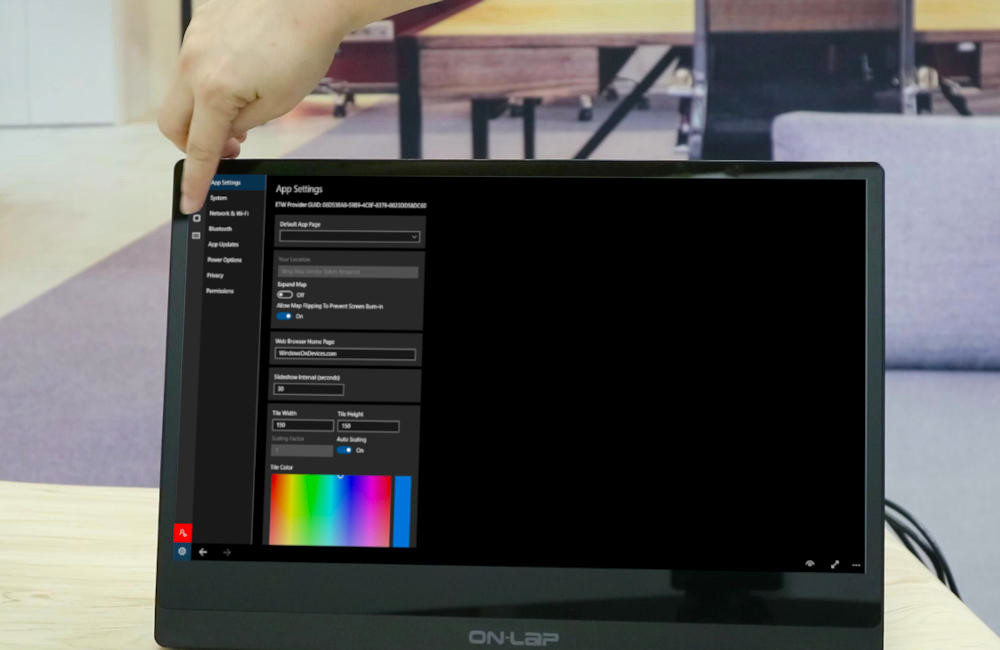
(Remark:M505T is a Windows 10 Compliant Capacitive touch monitor that is compliable to HID touch screen driver built inside Windows universal driver, so it supports plug and play.)
3. Display Resolution and Orientation Setting
M505T is a Windows 10 compatible touch monitor, so the Windows 10 IOT core operating system will automatically display M505T correctly when connected. If you need to make personalized display settings for individual needs, please follow the steps below to open “Windows Device Portal” on your laptop to configure the system settings of the IOT device.
① Open ”Windows Device Portal”
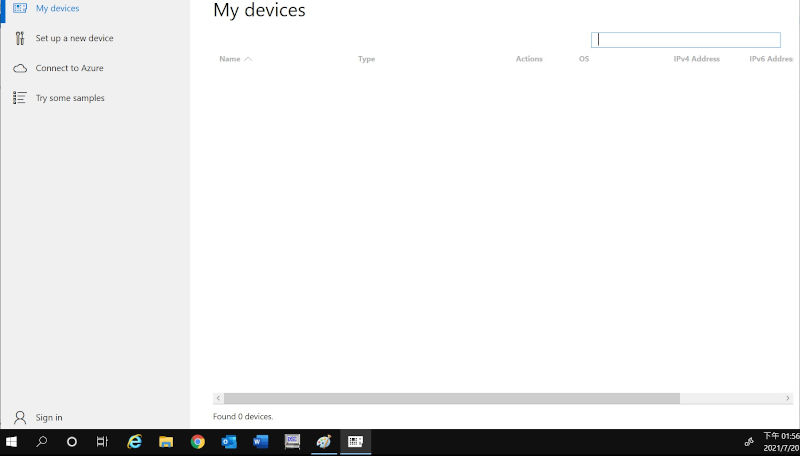
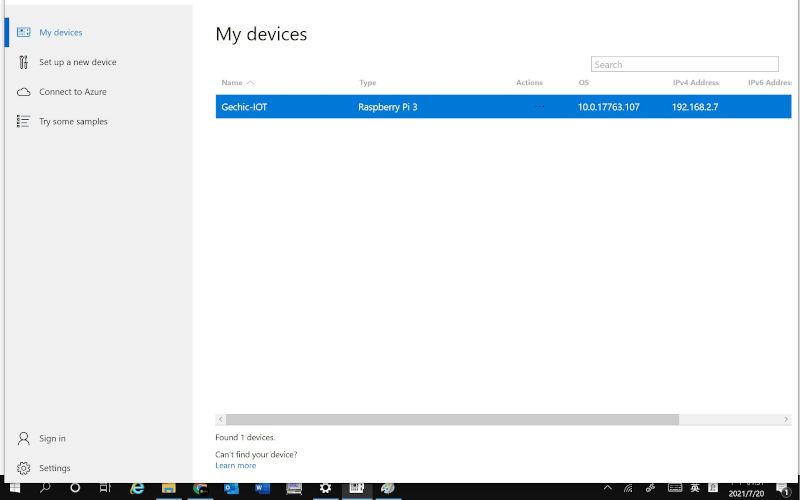
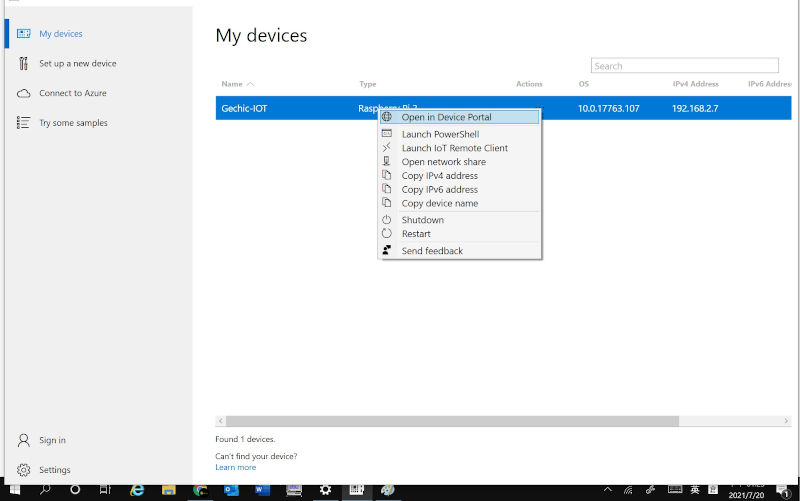
In “ IoT Core Dashboard”>>My Device, the IOT Raspberry Pi connected to the same network domain will be displayed here. Right-click on the device >> select "Open in device portal. Windows Device Portal will open in the default browser, Chrome or Edge.
② Display Setting and On-Screen Keyboard Setting
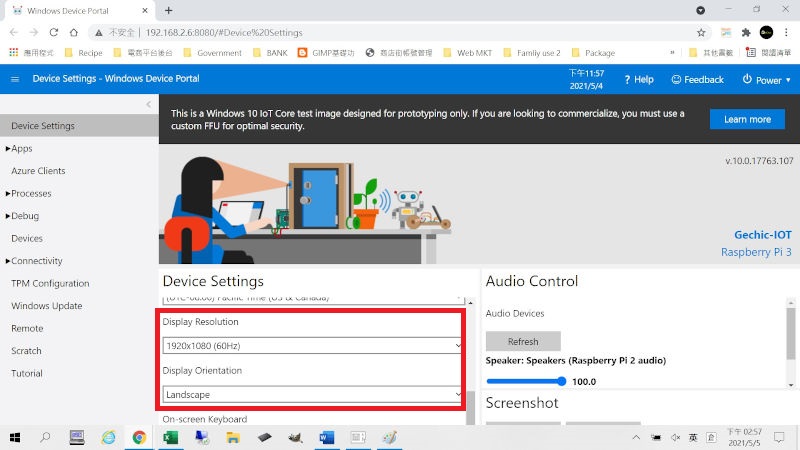
▲ Windows Device Portal can set up IOT devices through 8080 port connection:select the required resolution and frequency in 【Display Resolution 】. In 【Display Orientation】, you can specify the display directions such as Landscape, Portrait, Landscape flipped, and Portrait flipped.
Note 1: In Resolution, please select “ 1920x1080 (60Hz) for M505T
Note 2: When Portrait / Portrait (Flipped) is selected for Display Orientation, the screen display will be changed to vertical, but the touch position remains horizontal. This is a technical support issue of Windows 10 IOT core and has not yet been resolved.
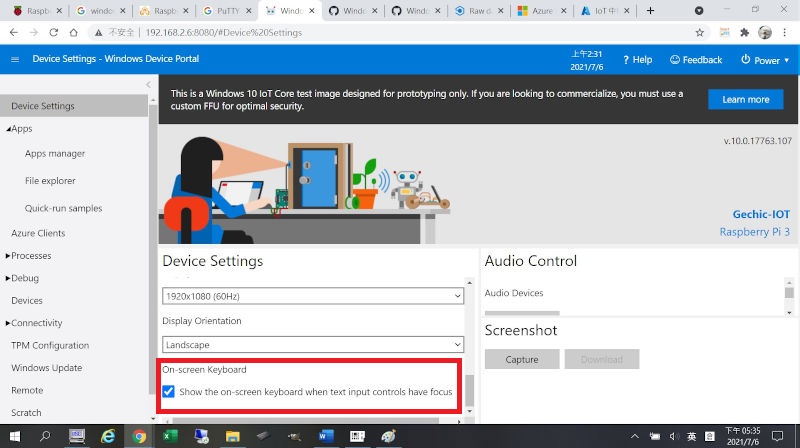
▲ If you need to use the on-screen keyboard, remember to check On-Screen Keyboard.